이 글은 Notion에서 작성 후 재편집한 포스트입니다.
오늘의 목표
1. Tablayout, Viewpager 사용하기
참고
[Android] TabLayout과 ViewPager
포스팅 하려는 목록들을 정리하다 보니, 생각보다 많아 언제 다하지.. 하는 생각만 드네요.. 욕심이 과한 걸까요..ㅠ 그래도 포기하지 않고 천천히라도 하나씩 하나씩 포스팅해봐야겠어요.! 오늘
re-build.tistory.com
개발환경
안드로이드 스튜디오 3.6.3
JDK 14.0.1
진행 과정
1. Tablayout과 Viewpager란?
안드로이드를 공부하다보면 Tabhost 라는 친구가 있다. 관련한 포스팅을 이전에도 한 적이 있는데, 탭호스트는 탭을 클릭해야만 이동할 수 있다.
관련 포스팅 : kkkapuq.tistory.com/14?category=807154
[Android Sutdio를 활용한 안드로이드 프로그래밍] 직접풀어보기 6-3
<문제> 탭호스트를 이용해서 선택 앱을 작성하라. 탭 위젯을 아래쪽에 배치하고 탭은 4개가 나오도록 한다. 프레임레이아웃 안의 3개 리니어레이아웃을 제거하고 4개의 이미지뷰로 배치한다. <결
kkkapuq.tistory.com
Tablayout도 Tabhost와 큰 차이점은 없지만, 이 포스팅의 핵심은 Tablayout이라기보다 Viewpager에 있다.
그래서, Tablayout은 뭐고 Viewpager는 뭔데? 라고 묻는다면... 아래 사진과 같다.
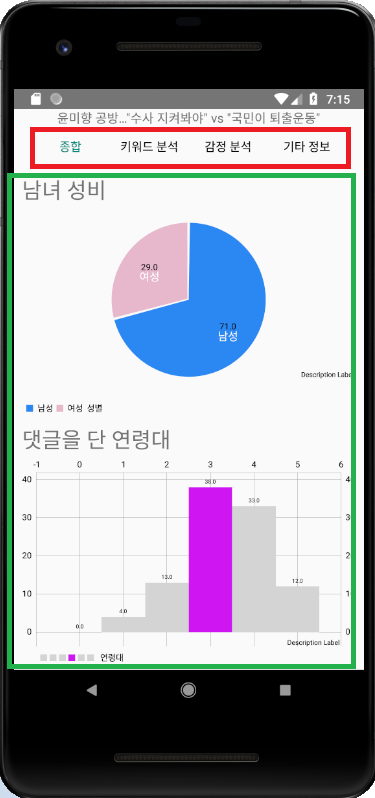
빨간 부분이 Tablayout, 초록색 부분이 내부를 채워넣을 Viewpager다.
Viewpager를 이용하면 슬라이드해서 양옆 탭으로 이동할 수 있는 기능을 구현할 수 있다. 실제로 많은 앱에서 사용중이 아주 대중적이고, 기본적인 기능이라고 할 수 있다.
Viewpager는 프래그먼트를 이용해서 내부를 표현하는데, 여기서 필요한 것이 어댑터이다.
그러니까, Viewpager 어댑터에 필요한 정보들을 넣으면, 이 어댑터 내부의 데이터를 기반으로 Viewpager에 출력해주는 것이다.
결과가 궁금하다면 맨 아래에 움짤로 찍어놨으니 그걸 보면된다.
2. 개발하기
1. gradle.app
Viewpager를 사용하기 위해선 implementation을 진행해줘야 한다. gradle에 다음과 같이 선언해주도록 하자.
implementation 'com.google.android.material:material:1.0.0'
implementation 'com.android.support:design:28.1.0'
위에껀 Tablayout에 필요하고, 밑에껀 Viewpager에 필요하다.
2. Tablayout 구성하기 (activity_result.xml)
<?xml version="1.0" encoding="utf-8"?>
<LinearLayout xmlns:android="http://schemas.android.com/apk/res/android"
xmlns:app="http://schemas.android.com/apk/res-auto"
android:orientation="vertical"
android:layout_width="match_parent"
android:layout_height="match_parent"
android:gravity="center_horizontal">
<TextView
android:id="@+id/articleTitle"
android:layout_width="match_parent"
android:layout_height="wrap_content"
android:text="윤미향 공방…"수사 지켜봐야" vs "국민이 퇴출운동""
android:textAlignment="center"
android:textSize="15dp"/>
<com.google.android.material.tabs.TabLayout
android:id="@+id/layout_tab"
android:layout_width="match_parent"
android:layout_height="wrap_content"
app:tabGravity="center"
app:tabMode="fixed"
app:tabTextColor="#000000"
app:tabSelectedTextColor="@color/colorPrimary"
app:tabIndicatorColor="@color/colorPrimaryDark"/>
<androidx.viewpager.widget.ViewPager
android:id="@+id/layout_viewPager"
android:layout_width="match_parent"
android:layout_height="match_parent"/>
</LinearLayout>진행중인 프로젝트 그대로 복붙한거라 텍스트같은건 신경쓰지말자. 아무튼 TabLayout과 Viewpager를 다음과 같이 설정해주고, Viewpager 내부에 들어가야 할 항목에 대한 fragment를 짜주도록 하자.
fragment는 안드로이드 UI구성에 있어서 필수적인 요소 중 하나이다. 간단하게 설명하자면 화면을 구성하는 Acitivity안에 또 다른 화면을 구성하는 Acitvity 같은 개념인데, fragment가 뭔지 모르겠다면 반드시 fragment가 어떤 친구인지 간단하게라도 읽어보고 다음단계를 진행하는걸 추천한다.
3. fragment 짜주기
<!-- fragment_total.xml-->
<?xml version="1.0" encoding="utf-8"?>
<LinearLayout
    xmlns:android="http://schemas.android.com/apk/res/android"
    android:layout_width="match_parent"
    android:layout_height="match_parent"
    android:orientation="vertical">
    <ScrollView
        android:id="@+id/total"
        android:layout_width="match_parent"
        android:layout_height="match_parent">
        <LinearLayout
            android:layout_width="match_parent"
            android:layout_height="match_parent"
            android:orientation="vertical"
            android:id="@+id/totalLayout">
            <LinearLayout
                android:layout_width="match_parent"
                android:layout_height="wrap_content"
                android:orientation="vertical">
                <TextView
                    android:layout_width="wrap_content"
                    android:layout_height="wrap_content"
                    android:text="남녀 성비"
                    android:textSize="25dp"
                    android:layout_marginLeft="10dp"
                    android:layout_marginTop="10dp"/>
                <RelativeLayout
                    android:layout_width="match_parent"
                    android:layout_height="250dp">
                    <com.github.mikephil.charting.charts.PieChart
                        android:id="@+id/sexRateChart"
                        android:layout_width="match_parent"
                        android:layout_height="match_parent">
                    </com.github.mikephil.charting.charts.PieChart>
                </RelativeLayout>
            </LinearLayout>
            <LinearLayout
                android:layout_width="match_parent"
                android:layout_height="wrap_content"
                android:orientation="vertical">
                <TextView
                    android:layout_width="wrap_content"
                    android:layout_height="wrap_content"
                    android:text="댓글을 단 연령대"
                    android:textSize="25dp"
                    android:layout_marginLeft="10dp"
                    android:layout_marginTop="10dp"/>
                <RelativeLayout
                    android:layout_width="match_parent"
                    android:layout_height="250dp">
                    <com.github.mikephil.charting.charts.BarChart
                        android:id="@+id/ageRateChart"
                        android:layout_width="match_parent"
                        android:layout_height="match_parent">
                    </com.github.mikephil.charting.charts.BarChart>
                </RelativeLayout>
            </LinearLayout>
            <LinearLayout
                android:layout_width="match_parent"
                android:layout_height="wrap_content"
                android:orientation="vertical">
                <TextView
                    android:layout_width="wrap_content"
                    android:layout_height="wrap_content"
                    android:text="댓글 등록 시간대"
                    android:textSize="25dp"
                    android:layout_marginLeft="10dp"
                    android:layout_marginTop="10dp"/>
                <RelativeLayout
                    android:layout_width="match_parent"
                    android:layout_height="250dp">
                    <com.github.mikephil.charting.charts.LineChart
                        android:id="@+id/timeLineChart"
                        android:layout_width="match_parent"
                        android:layout_height="match_parent">
                    </com.github.mikephil.charting.charts.LineChart>
                </RelativeLayout>
            </LinearLayout>
        </LinearLayout>
    </ScrollView>
</LinearLayout>
여기서 본인이 원하는 데이터를 넣어주면 된다. ScrollView 전체 싹 다 지우고 본인이 원하는 화면 구성하면된다. 나는 다음과 같이 코드를 짜줬다.
<!-- fragment_keyword.xml-->
<?xml version="1.0" encoding="utf-8"?>
<LinearLayout
    xmlns:android="http://schemas.android.com/apk/res/android"
    android:layout_width="match_parent"
    android:layout_height="match_parent"
    android:orientation="vertical">
    <ScrollView
        android:id="@+id/Keyword"
        android:layout_width="match_parent"
        android:layout_height="match_parent">
        <LinearLayout
            android:layout_width="match_parent"
            android:layout_height="match_parent"
            android:orientation="vertical"
            android:id="@+id/keywordLayout">
            <LinearLayout
                android:layout_width="match_parent"
                android:layout_height="wrap_content"
                android:orientation="vertical">
                <TextView
                    android:layout_width="wrap_content"
                    android:layout_height="wrap_content"
                    android:text="키워드 클라우드"
                    android:textSize="25dp"
                    android:layout_marginLeft="10dp"
                    android:layout_marginTop="10dp"/>
                <RelativeLayout
                    android:layout_width="match_parent"
                    android:layout_height="250dp">
                    <ImageView
                        android:layout_width="match_parent"
                        android:layout_height="match_parent"
                        android:src="@drawable/keyword_ex"/>
                </RelativeLayout>
            </LinearLayout>
            <LinearLayout
                android:layout_width="match_parent"
                android:layout_height="wrap_content"
                android:orientation="vertical">
                <TextView
                    android:layout_width="wrap_content"
                    android:layout_height="wrap_content"
                    android:text="긍정 키워드 TOP 5"
                    android:textSize="25dp"
                    android:layout_marginLeft="10dp"
                    android:layout_marginTop="10dp"/>
                <RelativeLayout
                    android:layout_width="match_parent"
                    android:layout_height="250dp">
                    <com.github.mikephil.charting.charts.PieChart
                        android:id="@+id/posKeywordChart"
                        android:layout_width="match_parent"
                        android:layout_height="match_parent">
                    </com.github.mikephil.charting.charts.PieChart>
                </RelativeLayout>
            </LinearLayout>
            <LinearLayout
                android:layout_width="match_parent"
                android:layout_height="wrap_content"
                android:orientation="vertical">
                <TextView
                    android:layout_width="wrap_content"
                    android:layout_height="wrap_content"
                    android:text="부정 키워드 TOP 5"
                    android:textSize="25dp"
                    android:layout_marginLeft="10dp"
                    android:layout_marginTop="10dp"/>
                <RelativeLayout
                    android:layout_width="match_parent"
                    android:layout_height="250dp">
                    <com.github.mikephil.charting.charts.PieChart
                        android:id="@+id/negKeywordChart"
                        android:layout_width="match_parent"
                        android:layout_height="match_parent">
                    </com.github.mikephil.charting.charts.PieChart>
                </RelativeLayout>
            </LinearLayout>
        </LinearLayout>
    </ScrollView>

</LinearLayout>
<!-- fragment_emotion.xml-->
<?xml version="1.0" encoding="utf-8"?>
<LinearLayout
xmlns:android="http://schemas.android.com/apk/res/android"
android:layout_width="match_parent"
android:layout_height="match_parent"
android:orientation="vertical">
<ScrollView
android:id="@+id/Emotion"
android:layout_width="match_parent"
android:layout_height="match_parent">
<LinearLayout
android:layout_width="match_parent"
android:layout_height="match_parent"
android:orientation="vertical"
android:id="@+id/emotionLayout">
</LinearLayout>
</ScrollView>
</LinearLayout><!-- fragment_etc.xml-->
<?xml version="1.0" encoding="utf-8"?>
<LinearLayout
xmlns:android="http://schemas.android.com/apk/res/android"
android:layout_width="match_parent"
android:layout_height="match_parent"
android:orientation="vertical">
<ScrollView
android:id="@+id/Etc"
android:layout_width="match_parent"
android:layout_height="wrap_content">
<LinearLayout
android:layout_width="match_parent"
android:layout_height="match_parent"
android:orientation="vertical"
android:id="@+id/etcLayout">
<LinearLayout
android:layout_width="match_parent"
android:layout_height="match_parent"
android:orientation="vertical">
<TextView
android:layout_width="wrap_content"
android:layout_height="wrap_content"
android:text="비슷한 기사"
android:textSize="25dp"
android:layout_marginLeft="10dp"
android:layout_marginTop="10dp"/>
<LinearLayout
android:layout_width="match_parent"
android:layout_height="200dp"
android:orientation="horizontal">
<ImageView
android:id="@+id/simArticleImg1"
android:layout_width="150dp"
android:layout_height="150dp"
android:layout_marginLeft="10dp"
android:layout_marginTop="25dp"
android:src="@drawable/img_noimg"/>
<LinearLayout
android:layout_width="match_parent"
android:layout_height="match_parent"
android:orientation="vertical">
<TextView
android:id="@+id/simArticleTitle1"
android:layout_width="match_parent"
android:layout_height="wrap_content"
android:text="기사 제목"
android:textSize="20dp"
android:layout_marginLeft="10dp"
android:layout_marginTop="10dp"/>
<TextView
android:id="@+id/simArticleCon1"
android:layout_width="match_parent"
android:layout_height="match_parent"
android:layout_marginLeft="10dp"
android:text="기사 내용"/>
</LinearLayout>
</LinearLayout>
<LinearLayout
android:layout_width="match_parent"
android:layout_height="200dp"
android:orientation="horizontal">
<ImageView
android:id="@+id/simArticleImg2"
android:layout_width="150dp"
android:layout_height="150dp"
android:layout_marginLeft="10dp"
android:layout_marginTop="25dp"
android:src="@drawable/img_noimg"/>
<LinearLayout
android:layout_width="match_parent"
android:layout_height="match_parent"
android:orientation="vertical">
<TextView
android:id="@+id/simArticleTitle2"
android:layout_width="match_parent"
android:layout_height="wrap_content"
android:text="기사 제목"
android:textSize="20dp"
android:layout_marginLeft="10dp"
android:layout_marginTop="10dp"/>
<TextView
android:id="@+id/simArticleCon2"
android:layout_width="match_parent"
android:layout_height="match_parent"
android:layout_marginLeft="10dp"
android:text="기사 내용"/>
</LinearLayout>
</LinearLayout>
<LinearLayout
android:layout_width="match_parent"
android:layout_height="200dp"
android:orientation="horizontal">
<ImageView
android:id="@+id/simArticleImg3"
android:layout_width="150dp"
android:layout_height="150dp"
android:layout_marginLeft="10dp"
android:layout_marginTop="25dp"
android:src="@drawable/img_noimg"/>
<LinearLayout
android:layout_width="match_parent"
android:layout_height="match_parent"
android:orientation="vertical">
<TextView
android:id="@+id/simArticleTitle3"
android:layout_width="match_parent"
android:layout_height="wrap_content"
android:text="기사 제목"
android:textSize="20dp"
android:layout_marginLeft="10dp"
android:layout_marginTop="10dp"/>
<TextView
android:id="@+id/simArticleCon3"
android:layout_width="match_parent"
android:layout_height="match_parent"
android:layout_marginLeft="10dp"
android:text="기사 내용"/>
</LinearLayout>
</LinearLayout>
</LinearLayout>
</LinearLayout>
</ScrollView>
</LinearLayout>총 4개의 화면을 구성해줄 fragment들을 짰다. fragment라고 해서 뭐 별다른걸 추가하는건 아니고, 그냥 layout 에 xml 추가해주면된다.
4. ViewpagerAdapter.java
adapter는 FragmentStatePagerAdapter 를 상속받아 만들어졌는데, Fragment의 관리를 도와주는 FragmentManager도 설정해주도록 한다.
Override된 메서드는 다음과 같다.
- getItem() - position에 해당하는 Fragment를 반환한다.
- getCount() - 페이지의 갯수를 반환한다. mFragmentList 안에 fragment를 넣어줬고, 그 수만큼 반환해준다.
package com.example.myapplication;

import java.util.ArrayList;
import java.util.List;

import androidx.fragment.app.Fragment;
import androidx.fragment.app.FragmentManager;
import androidx.fragment.app.FragmentStatePagerAdapter;

public class ViewPagerAdapter extends FragmentStatePagerAdapter {
    private final List<Fragment> mFragmentList = new ArrayList<>();
    private final List<String> mFragmentTitleList = new ArrayList<>();

    public void addFragment(Fragment fragment, String title){
        mFragmentList.add(fragment);
        mFragmentTitleList.add(title);
    }
    public CharSequence getPageTitle(int position) {
        return mFragmentTitleList.get(position);
    }
    public ViewPagerAdapter(FragmentManager fm){
        super(fm);
    }
    @Override
    public Fragment getItem(int position) { return mFragmentList.get(position); }

    @Override
    public int getCount() {
        return mFragmentList.size() ;
    }
}
5. FragmentTotal.java
package fragment;

import android.os.Bundle;
import android.view.LayoutInflater;
import android.view.View;
import android.view.ViewGroup;

import com.example.myapplication.R;
import com.example.myapplication.ResultActivity;

import androidx.annotation.NonNull;
import androidx.annotation.Nullable;
import androidx.fragment.app.Fragment;
import androidx.viewpager.widget.ViewPager;

public class FragmentTotal extends Fragment {
    ViewPager viewPager;

    public void Fragment_Total(){
    }

    @Nullable
    @Override
    public View onCreateView(@NonNull LayoutInflater inflater, @Nullable ViewGroup container, @Nullable Bundle savedInstanceState) {
        View view = inflater.inflate(R.layout.fragment_total, container, false);

        ResultActivity resultActivity = new ResultActivity();
        resultActivity.sexRateChart(view);
        resultActivity.ageRateChart(view);
        resultActivity.timeLineChart(view);

        return view;
    }
}
해당하는 프래그먼트를 호출해주는 자바 파일이다. inflater를 통해서 fragment를 그려주는 역할을 한다. 여기서 중요한점은, 이 fragment를 배치해주는 자바 파일 내부에서 findViewById를 통해 뷰의 데이터를 조작하고 싶다면, onCreateView 내부에 선언해줘야 에러가 발생하지 않는다.
나는 ResultActivity의 객체를 생성해주고, 해당 View를 매개변수로 넘겨줘서 화면을 그려주도록 했따. sexRateChart, ageRateChart, timeLineChart 같은 친구들은 ResultActivity 자바 파일에 정의되어있다.
그러므로, 본인이 만약에 여기다 무언가를 그리고 싶다면.. 다음과 같은 코드를 onCreateView 내부에 선언하면 된다 이말이다.
PieChart sexRateChart;
sexRateChart = view.findViewById(R.id.sexRateChart);
sexRateChart.setUsePercentValues(true);
sexRateChart.getDescription().setEnabled(true);
sexRateChart.setExtraOffsets(5f, 10f, 5f, 5f);
sexRateChart.setDragDecelerationFrictionCoef(0.95f);
sexRateChart.setDrawHoleEnabled(false);
sexRateChart.setHoleColor(Color.BLACK);
sexRateChart.setTransparentCircleRadius(61f);
6. ResultActivity.java
private ViewPager mViewPager;
ViewPagerAdapter adapter = new ViewPagerAdapter(getSupportFragmentManager());

@Override
protected void onCreate(@Nullable Bundle savedInstanceState) {
    super.onCreate(savedInstanceState);
    setContentView(R.layout.activity_result);

    mViewPager = findViewById(R.id.layout_viewPager);
    setupViewPager(mViewPager);

    TabLayout tabLayout = findViewById(R.id.layout_tab);
    tabLayout.setupWithViewPager(mViewPager);
}

public void setupViewPager(ViewPager viewPager) {
    adapter.addFragment(new FragmentTotal(), "종합");
    adapter.addFragment(new FragmentKeyword(), "키워드 분석");
    adapter.addFragment(new FragmentEmotion(), "감정 분석");
    adapter.addFragment(new FragmentEtc(), "기타 정보");

    viewPager.setAdapter(adapter);
}
먼저, 어댑터는 내가 위에서 정의한 어댑터를 설정해준다. 그리고 setupViewPager를 통해 화면에 정의해주도록 한다.
그런데, 여기서 의문점이 든다. 페이지를 정의해주는 것은 다음 코드에서 이미 진행이 되어 화면에 뿌려주는 역할을 담당한다.
TabLayout tabLayout = findViewById(R.id.layout_tab);
tabLayout.setupWithViewPager(mViewPager);
setupWithViewPager에서 이미 화면에 뿌려줬는데, 왜 또 설정하느냐? 인데..
답은, ViewPager를 TabLayout과 함께 쓴다면, setUpWithViewPager를 함께 연동해서 자동적으로 PagerAdapter의 타이틀로 옮겨진다.
그래서 밑에 setupViewPager를 사용하지 않으면 그저 tabLayout이 되버린다.
아무튼 결과는 다음과 같다.
불필요한 코드를 좀 빼버려서 화면과 똑같은 코드는 아니지만.. 쨋든 ViewPager와 Tablayout기능에 대해선 충분히 기술했따.
오늘의 결과
구독 및 하트는 정보 포스팅 제작에 큰 힘이됩니다♡
'개발일지 > 빅데이터 댓글 시각화 프로젝트' 카테고리의 다른 글
| [개발일지] for문으로 xml resource 가져오기(feat.getIdentifier()) (0) | 2020.12.10 |
|---|---|
| [개발일지] ArrayList<hashmap> 형태 활용하기 (0) | 2020.11.23 |
| [Python, MySQL] txt파일 csv파일 변환 및 데이터 가공 (feat. db 연동) (0) | 2020.07.28 |
| [에러] list indices must be integers or slices, not str (0) | 2020.07.11 |
| [Python] 네이버 기사 댓글 크롤링하기 2.0v (0) | 2020.07.11 |